3.2 KiB
Creating and Deploying a Contract
There are 3 type of environments Remix can be plugged to:
Javascript VM, Injected provider, or Web3 provider. (for details see Running transactions)
Both Web3 provider and Injected provider require the use of an
external tool.
The external tool for Web3 provider is an Ethereum node and for
Injected provider Metamask.
The JavaScript VM mode is convenient because each execution runs in
your browser and you don't need any other software or Ethereum node to run it.
So, it is the easiest test environment - no setup required!
But keep in mind that reloading the browser when you are in the Javascript VM will restart Remix in an empty state.
For performance purposes ( which is to say - for testing in an environment that is closest to the mainnet), it might also be better to use an external node.
Selecting the VM mode
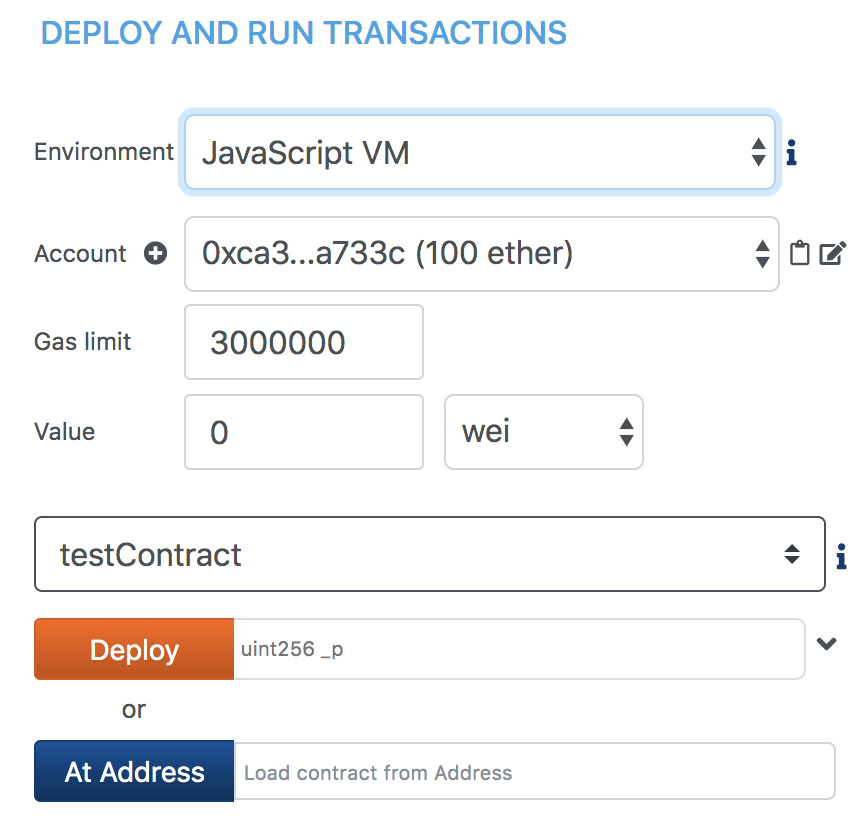
Make sure the VM mode is selected. All accounts displayed in Accounts
should have 100 ether.
Sample contract
{.sourceCode .none}
pragma solidity ^0.5.1;

contract testContract {

    uint value;

    constructor (uint _p) public {
        value = _p;
    }

    function setP(uint _n) payable public {
        value = _n;
    }

    function setNP(uint _n) public {
        value = _n;
    }

    function get () view public returns (uint) {
        return value;
    }
}
This contract is very basic. The goal is to quickly start to create and to interact with a sample contract.
Deploying an instance
The Compile tab displays information related to the current contract
(note that there can be more than one) (see ../compile_tab).
Moving on, in the Run tab select, JavaScript VM to specify that you
are going to deploy an instance of the contract in the JavaScript VM
state.
The constructor of Ballot.sol needs a parameter (of type uint8).
Give any value and click on Deploy.
The transaction which deploys the instance of Ballot is created.
In a "normal" blockchain, it can take several seconds to execute. This
is the time for the transaction to be mined. However, because we are
using the JavaScript VM, our execution is immediate.
The terminal will inform you about the transaction. You can see details there and start debugging.
The newly created instance is displayed in the run tab.
Interacting with an instance
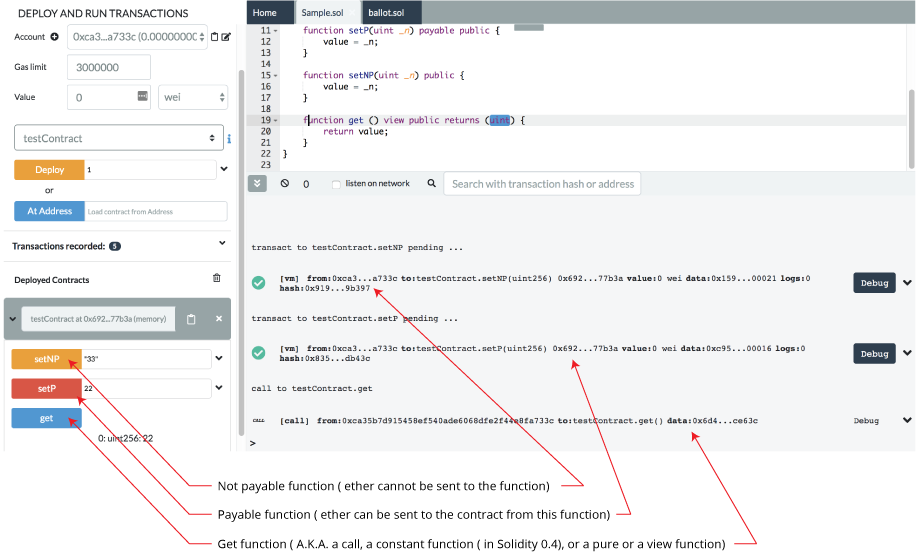
This new instance contains 3 actions which corresponds to the 3
functions (setP, setPN, get). Clicking on SetP or SetPN will
create a new transaction.
Note that SetP is payable (red button) : it is possible to send
value (Ether) to the contract.
SetPN is not payable (orange button - depending on the theme) : it is not possible to send
value (Ether) to the contract.
Clicking on get will not execute a transaction (usually its a blue button - depending on the theme). It doesn't execute a transaction because a get does not modify the state (variable
value) of this instance.
As get is view you can see the return value just below the
action.


